What to Expect in a Complete Roof Replacement: A Comprehensive Guide |
|
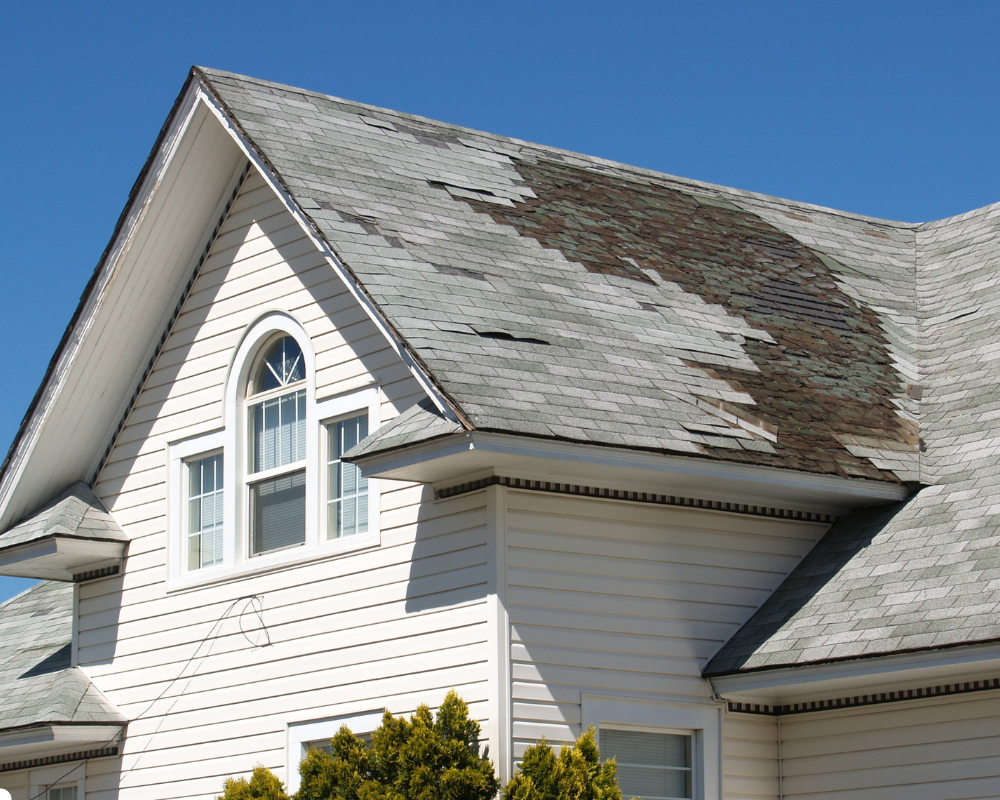
Introduction: Roof replacement is a significant investment for homeowners, but it is often necessary to ensure the safety, durability, and overall functionality of your home. Whether your roof is nearing the end of its lifespan or has been severely damaged, understanding what’s involved in a complete roof replacement can help you navigate the process with ease. In this blog, we’ll walk you through the steps of a complete roof replacement, from inspection to installation, so you can make informed decisions and be prepared for what lies ahead. 1. Roof Inspection and Evaluation Before any work begins, the first step in the roof replacement process is a thorough inspection by a professional roofing contractor. The inspector will assess the condition of your existing roof and determine whether a full replacement is necessary. This evaluation typically includes looking for signs of damage such as leaks, missing shingles, cracked tiles, or worn-out materials. If the roof is damaged beyond repair or is simply too old to continue maintaining, the contractor will recommend a full replacement. The roof’s age, the extent of the damage, and any underlying structural concerns are all factors that influence whether a repair or replacement is the best option. 2. Choosing the Right Roofing Material Once the decision to replace the roof is made, it’s time to choose the right materials for your new roof. There are several options to choose from, each with its own set of benefits, costs, and lifespan. Some of the most common roofing materials include asphalt shingles, metal roofing, clay tiles, and slate. Your roofing contractor will help guide you through the decision-making process, taking into consideration factors such as climate, budget, and aesthetic preferences. For instance, if you live in an area that experiences heavy rainfall or snow, a durable roofing material like metal may be a good choice due to its ability to withstand extreme weather conditions. Asphalt shingles, on the other hand, are a more affordable option that provides excellent protection and longevity. 3. Roof Tear-Off and Removal Once the materials have been chosen, the next step is the tear-off process. This involves removing the old roofing materials, including shingles, underlayment, and flashing. It is important to completely remove the old roof to ensure that the new roofing system is installed on a clean, stable foundation. During this stage, any damaged sections of the roof deck may also be replaced, depending on the condition of the underlying structure. This is a critical step in ensuring that your new roof has a solid foundation and can provide long-term protection. If you’re considering Roof Replacement Services in Los Angeles, experienced contractors will ensure that the tear-off is done professionally and efficiently, taking extra care to prevent damage to the home’s exterior or landscaping. 4. Roof Deck Inspection and Repair After the old materials have been removed, the contractor will inspect the roof deck, which is the wooden base of the roof. The deck may have sustained some wear and tear, such as rot or water damage, that needs to be repaired before the new roof is installed. If the roof deck is damaged, it must be replaced or repaired before proceeding with the installation of the new roofing system. This step ensures that the new roof has a secure foundation and will be able to withstand the elements for many years. A well-maintained roof deck is essential for the structural integrity of the new roof. 5. Installing the New Roof Once the deck is inspected and any necessary repairs are completed, it’s time to install the new roofing materials. The process begins with the installation of underlayment, which acts as a moisture barrier between the roof deck and the roofing material. This layer helps prevent water infiltration and provides an additional layer of protection for your home. Next, the roofing material (shingles, tiles, or metal panels) is installed in layers. Each layer is carefully placed and sealed to ensure that there are no gaps or vulnerabilities that could lead to leaks. Contractors will also install flashing around chimneys, vents, and other protrusions to ensure water doesn’t seep through these areas. The installation process can take several days, depending on the size of the roof and the type of materials used. During this phase, it’s important to ensure that all safety protocols are followed, and the worksite is kept clean and safe for the crew. 6. Finishing Touches and Cleanup Once the new roof is in place, the roofing contractor will perform a final inspection to ensure that the roof is properly installed and that no issues have been overlooked. The crew will check for any loose shingles, misaligned tiles, or incomplete flashing. Any necessary adjustments will be made to ensure the roof is fully secure. The contractor will also clean up the job site, removing any debris, nails, and leftover materials from the roof and surrounding areas. This ensures that the area around your home remains safe and tidy. Finally, the gutters and downspouts may also be inspected and cleaned to ensure proper drainage. Clogged or damaged gutters can prevent water from draining properly, which could lead to roof and foundation damage in the future. Conclusion: A complete roof replacement is a significant investment, but it’s one that can enhance the safety, comfort, and value of your home. By understanding the steps involved, you can be better prepared for the process and make informed decisions throughout the project. From initial inspection to the final installation, each phase plays a crucial role in ensuring your new roof is durable and long-lasting. |
 |